How to import manually
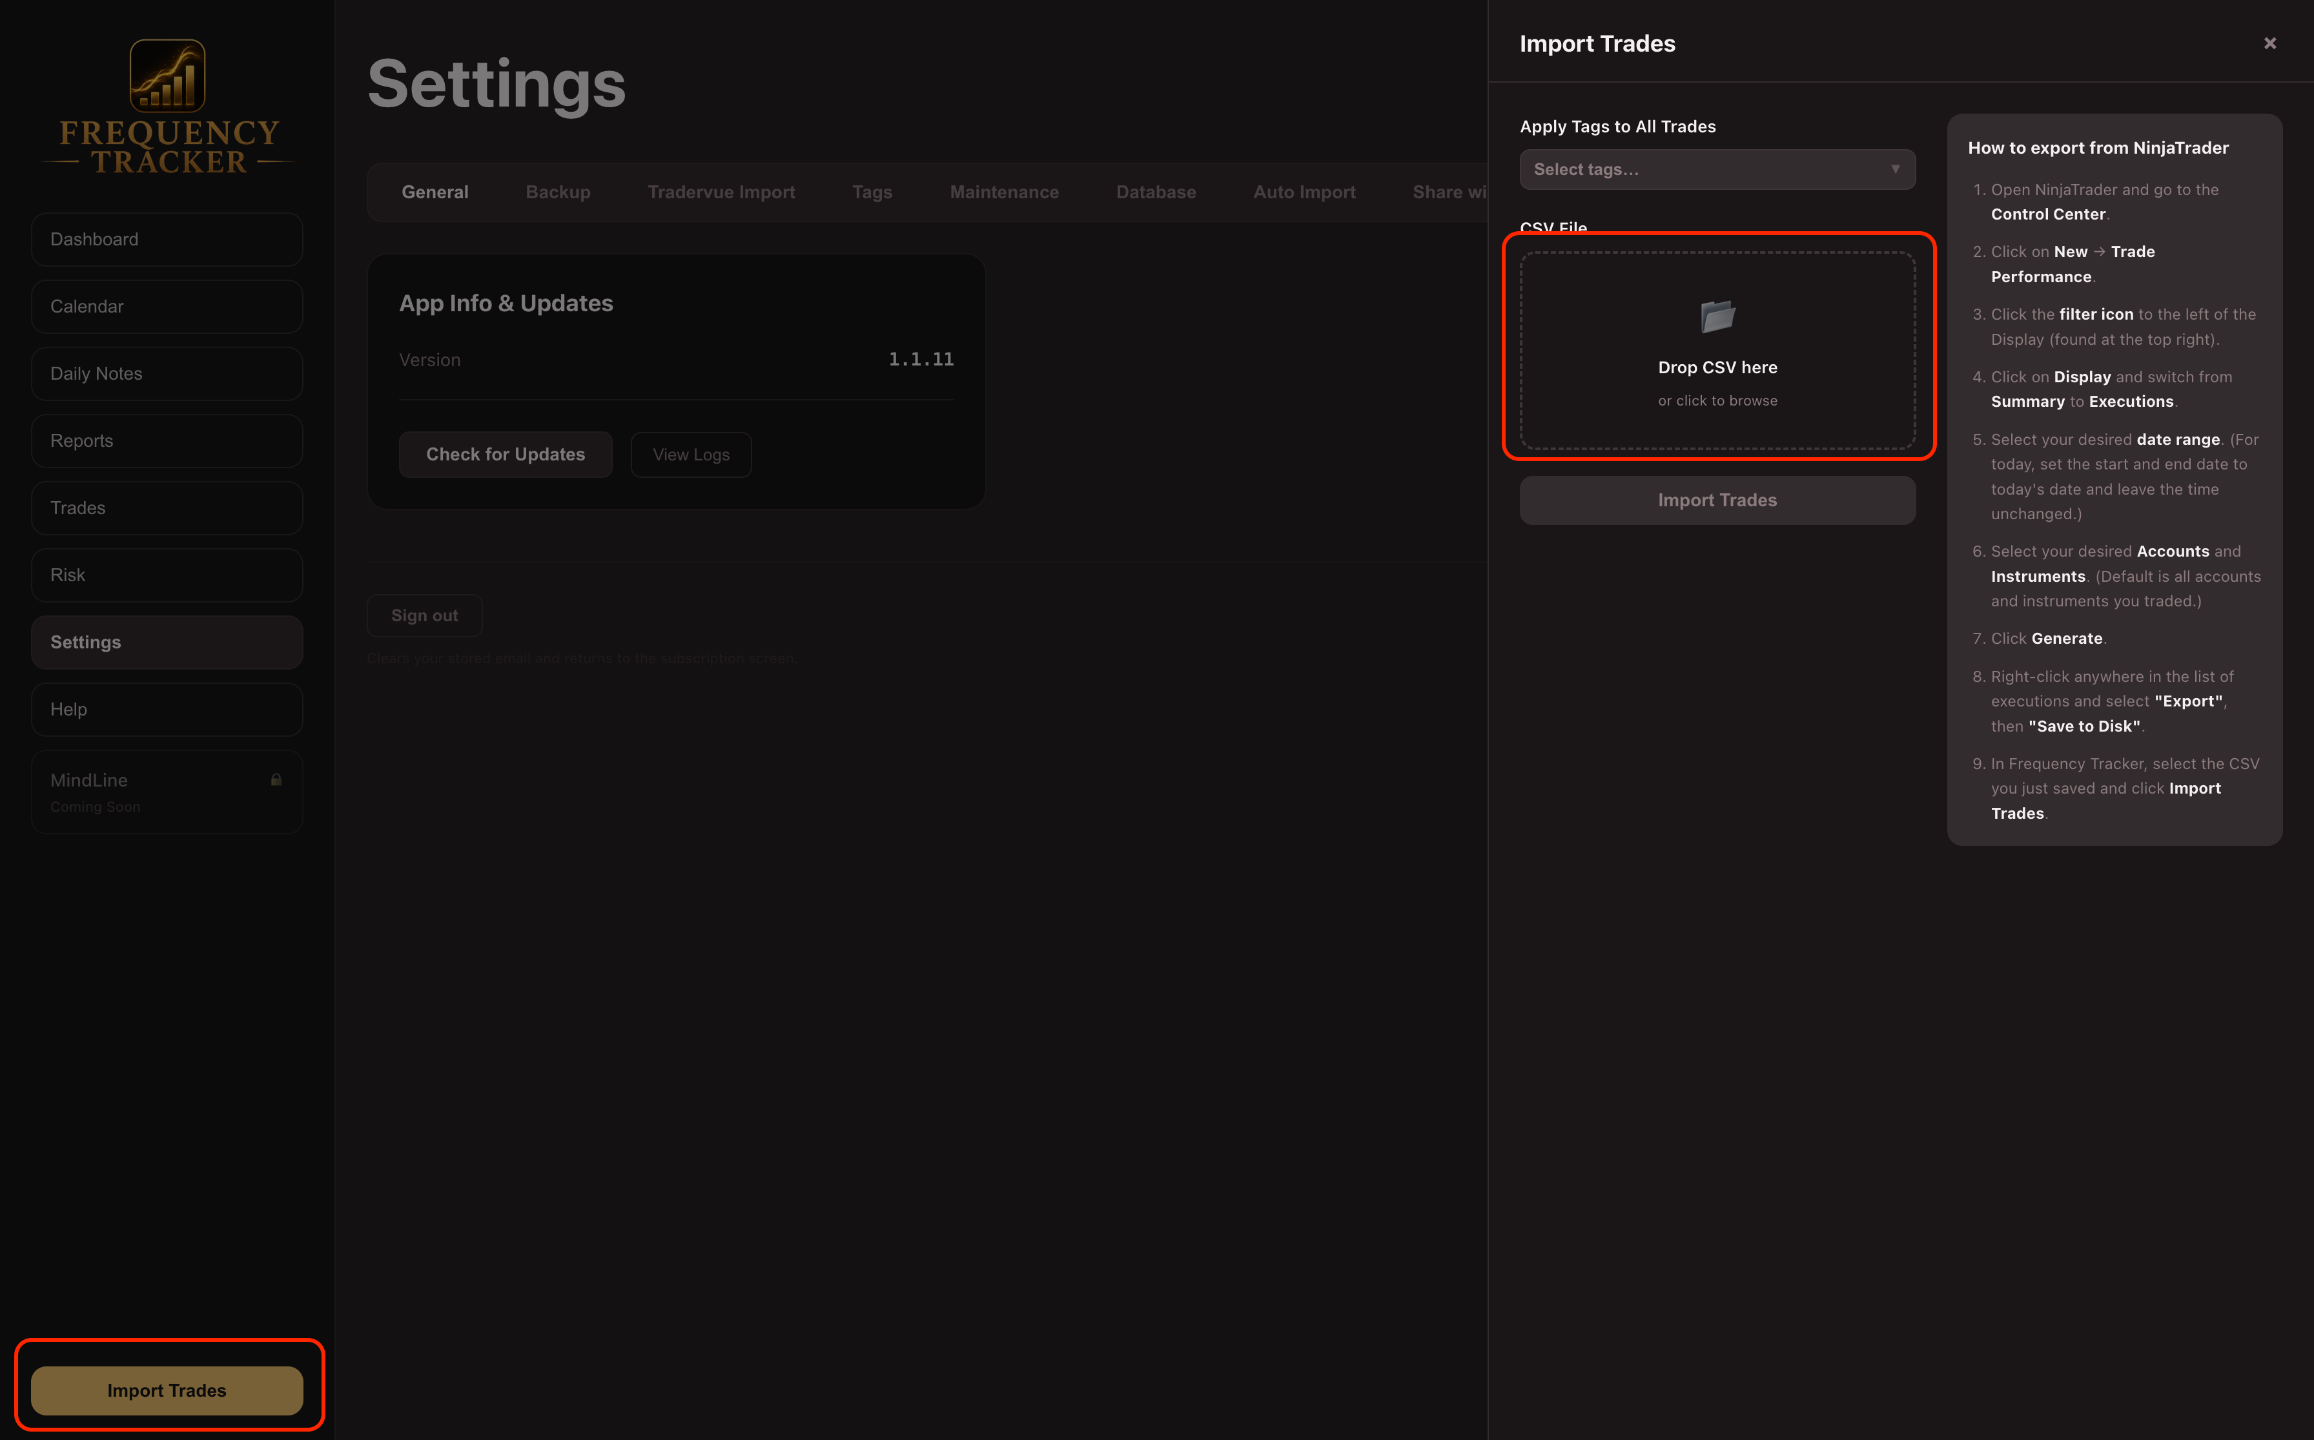
- In Frequency Tracker, go to the Import Trades panel.
- Drag or select your CSV file (See below on how to export a CSV file).
- Frequency Tracker will process it the same way it processes an auto-imported file — building trades, checking for duplicates, and grouping copied trades across accounts.
How to export from NinjaTrader
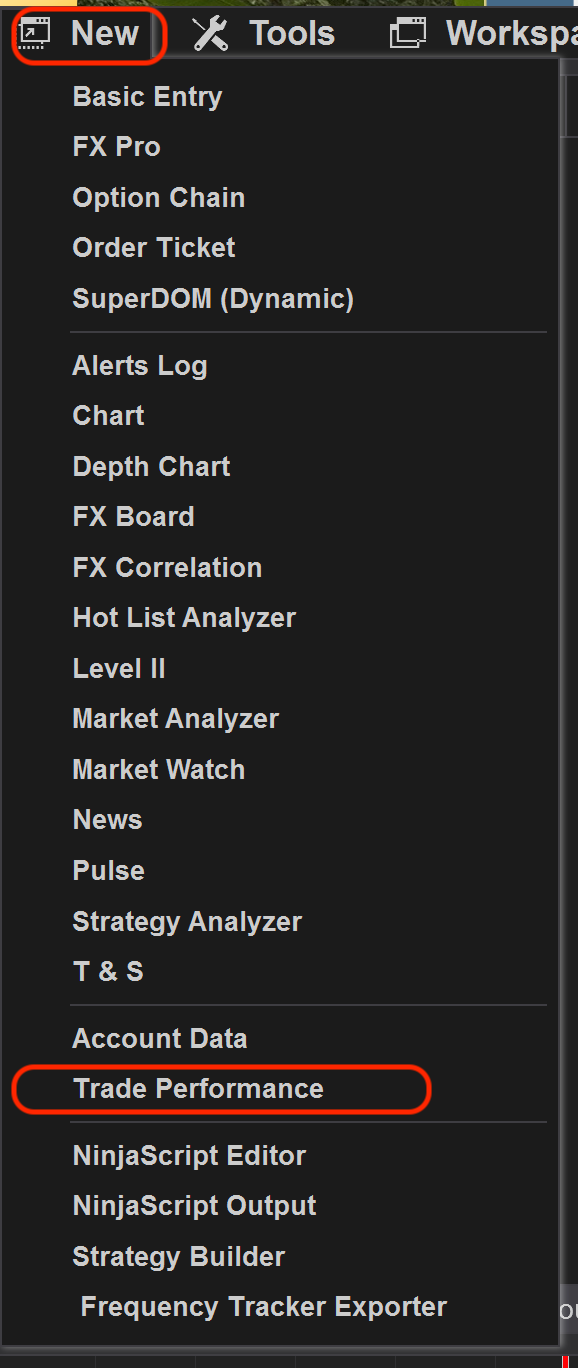
- Open NinjaTrader and go to the Control Center.
- Click on New → Trade Performance.
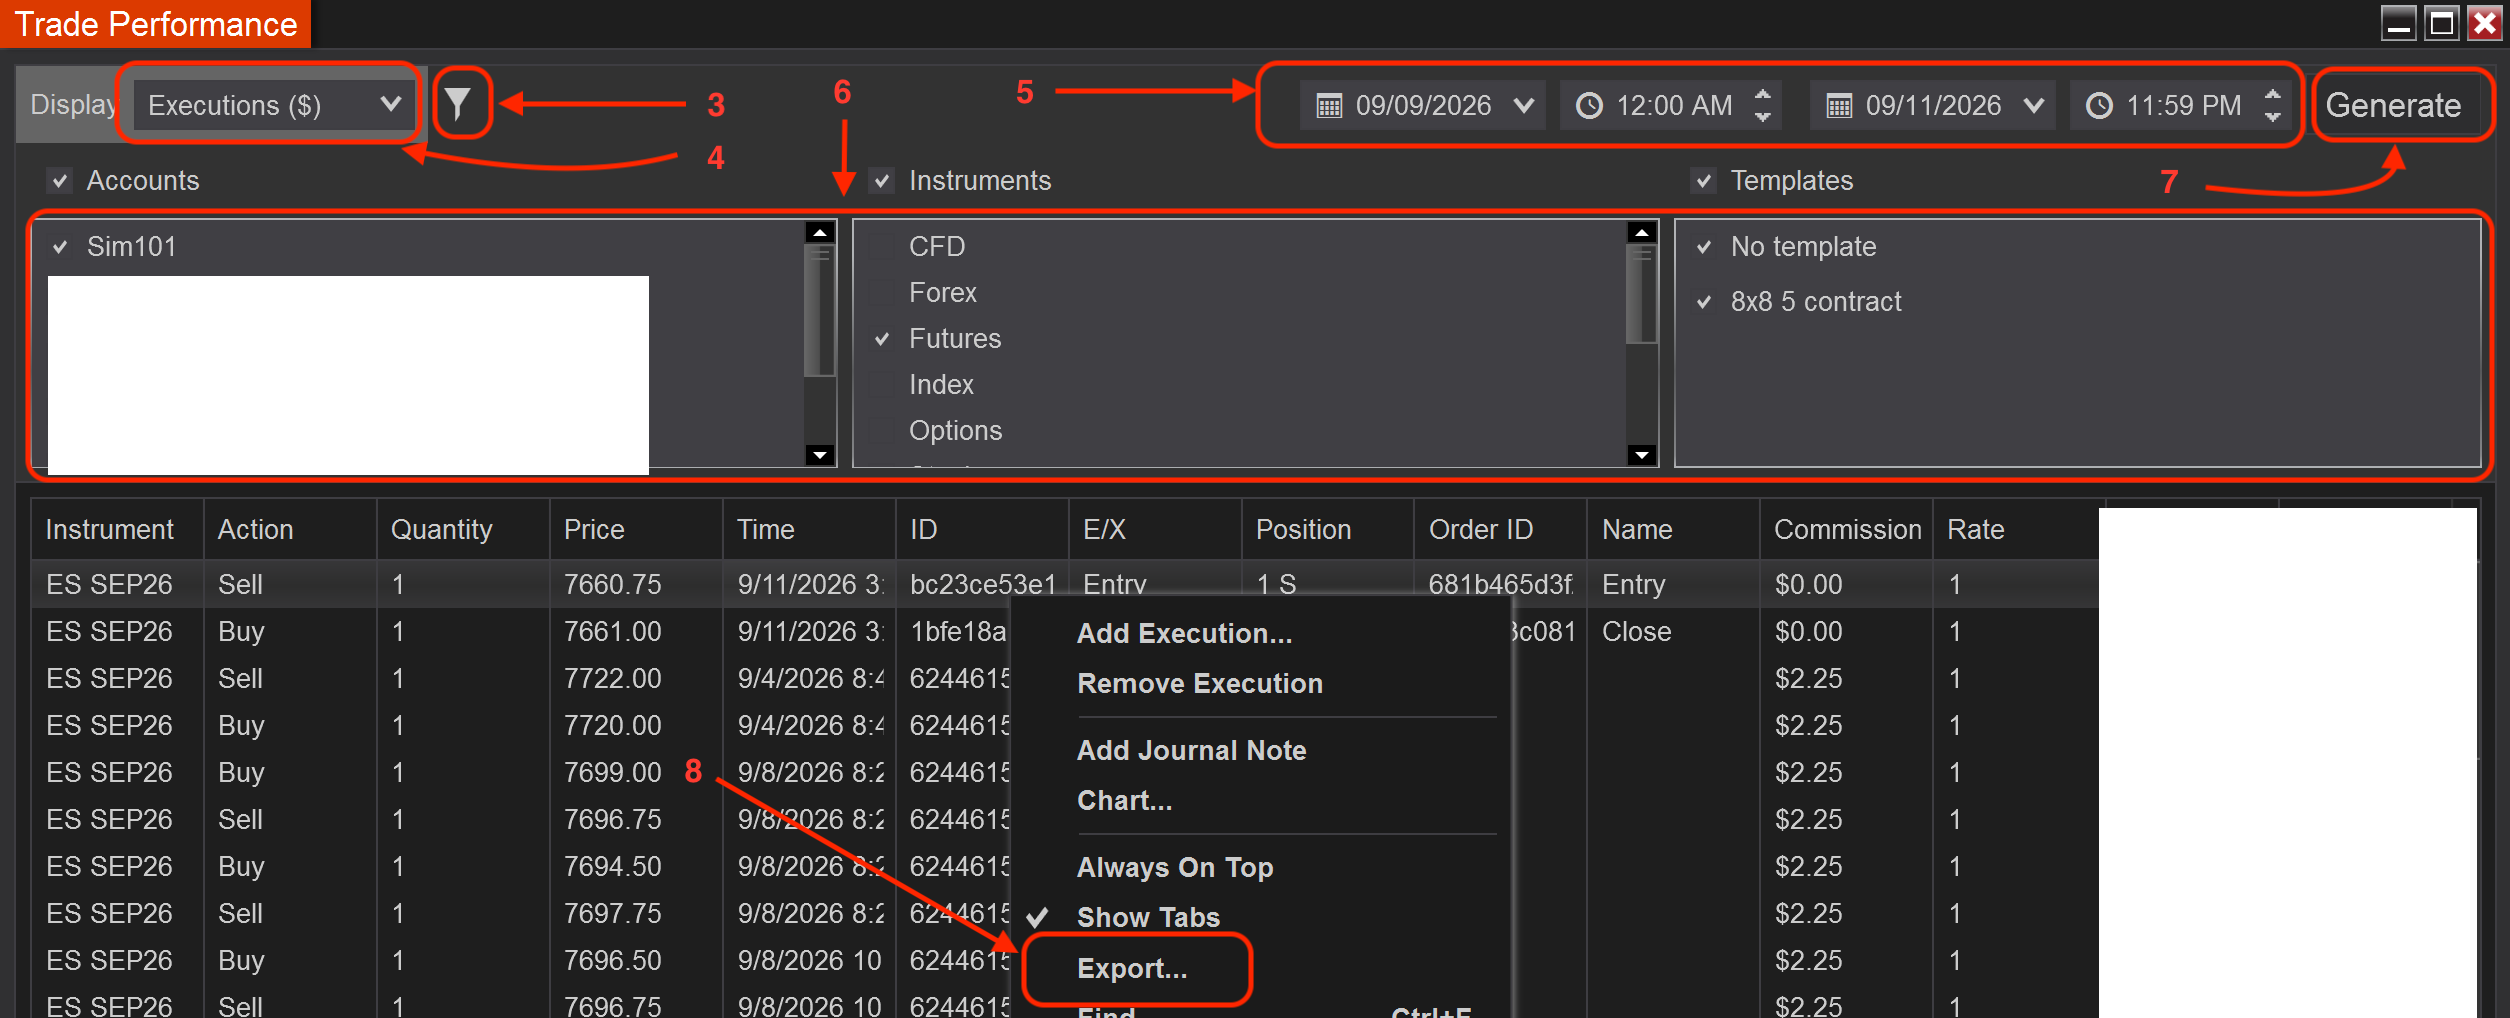
- Click the filter icon to the left of the Display (found at the top right).
- Click on Display and switch from Summary to Executions.
- Select your desired date range. (For today, set the start and end date to today's date and leave the time unchanged.)
- Select your desired Accounts and Instruments. (Default is all accounts and instruments you traded.)
- Click Generate.
- Right-click anywhere in the list of executions and select "Export", then "Save to Disk".
- In Frequency Tracker, select the CSV you just saved and click Import Trades.
NinjaTrader can generate export files in a few different formats depending on your settings, and we've built in handling for the common variations. If a file isn't importing correctly, send a copy to [email protected] and we'll take a look and get back to you.
Migrating from Tradervue
Do this first, before anything else. If you're moving your trade history over from Tradervue, migrate it before you set up auto-import or do any other CSV imports. Importing Tradervue history after other trades are already in Frequency Tracker can create duplicates.
- Log in to Tradervue.
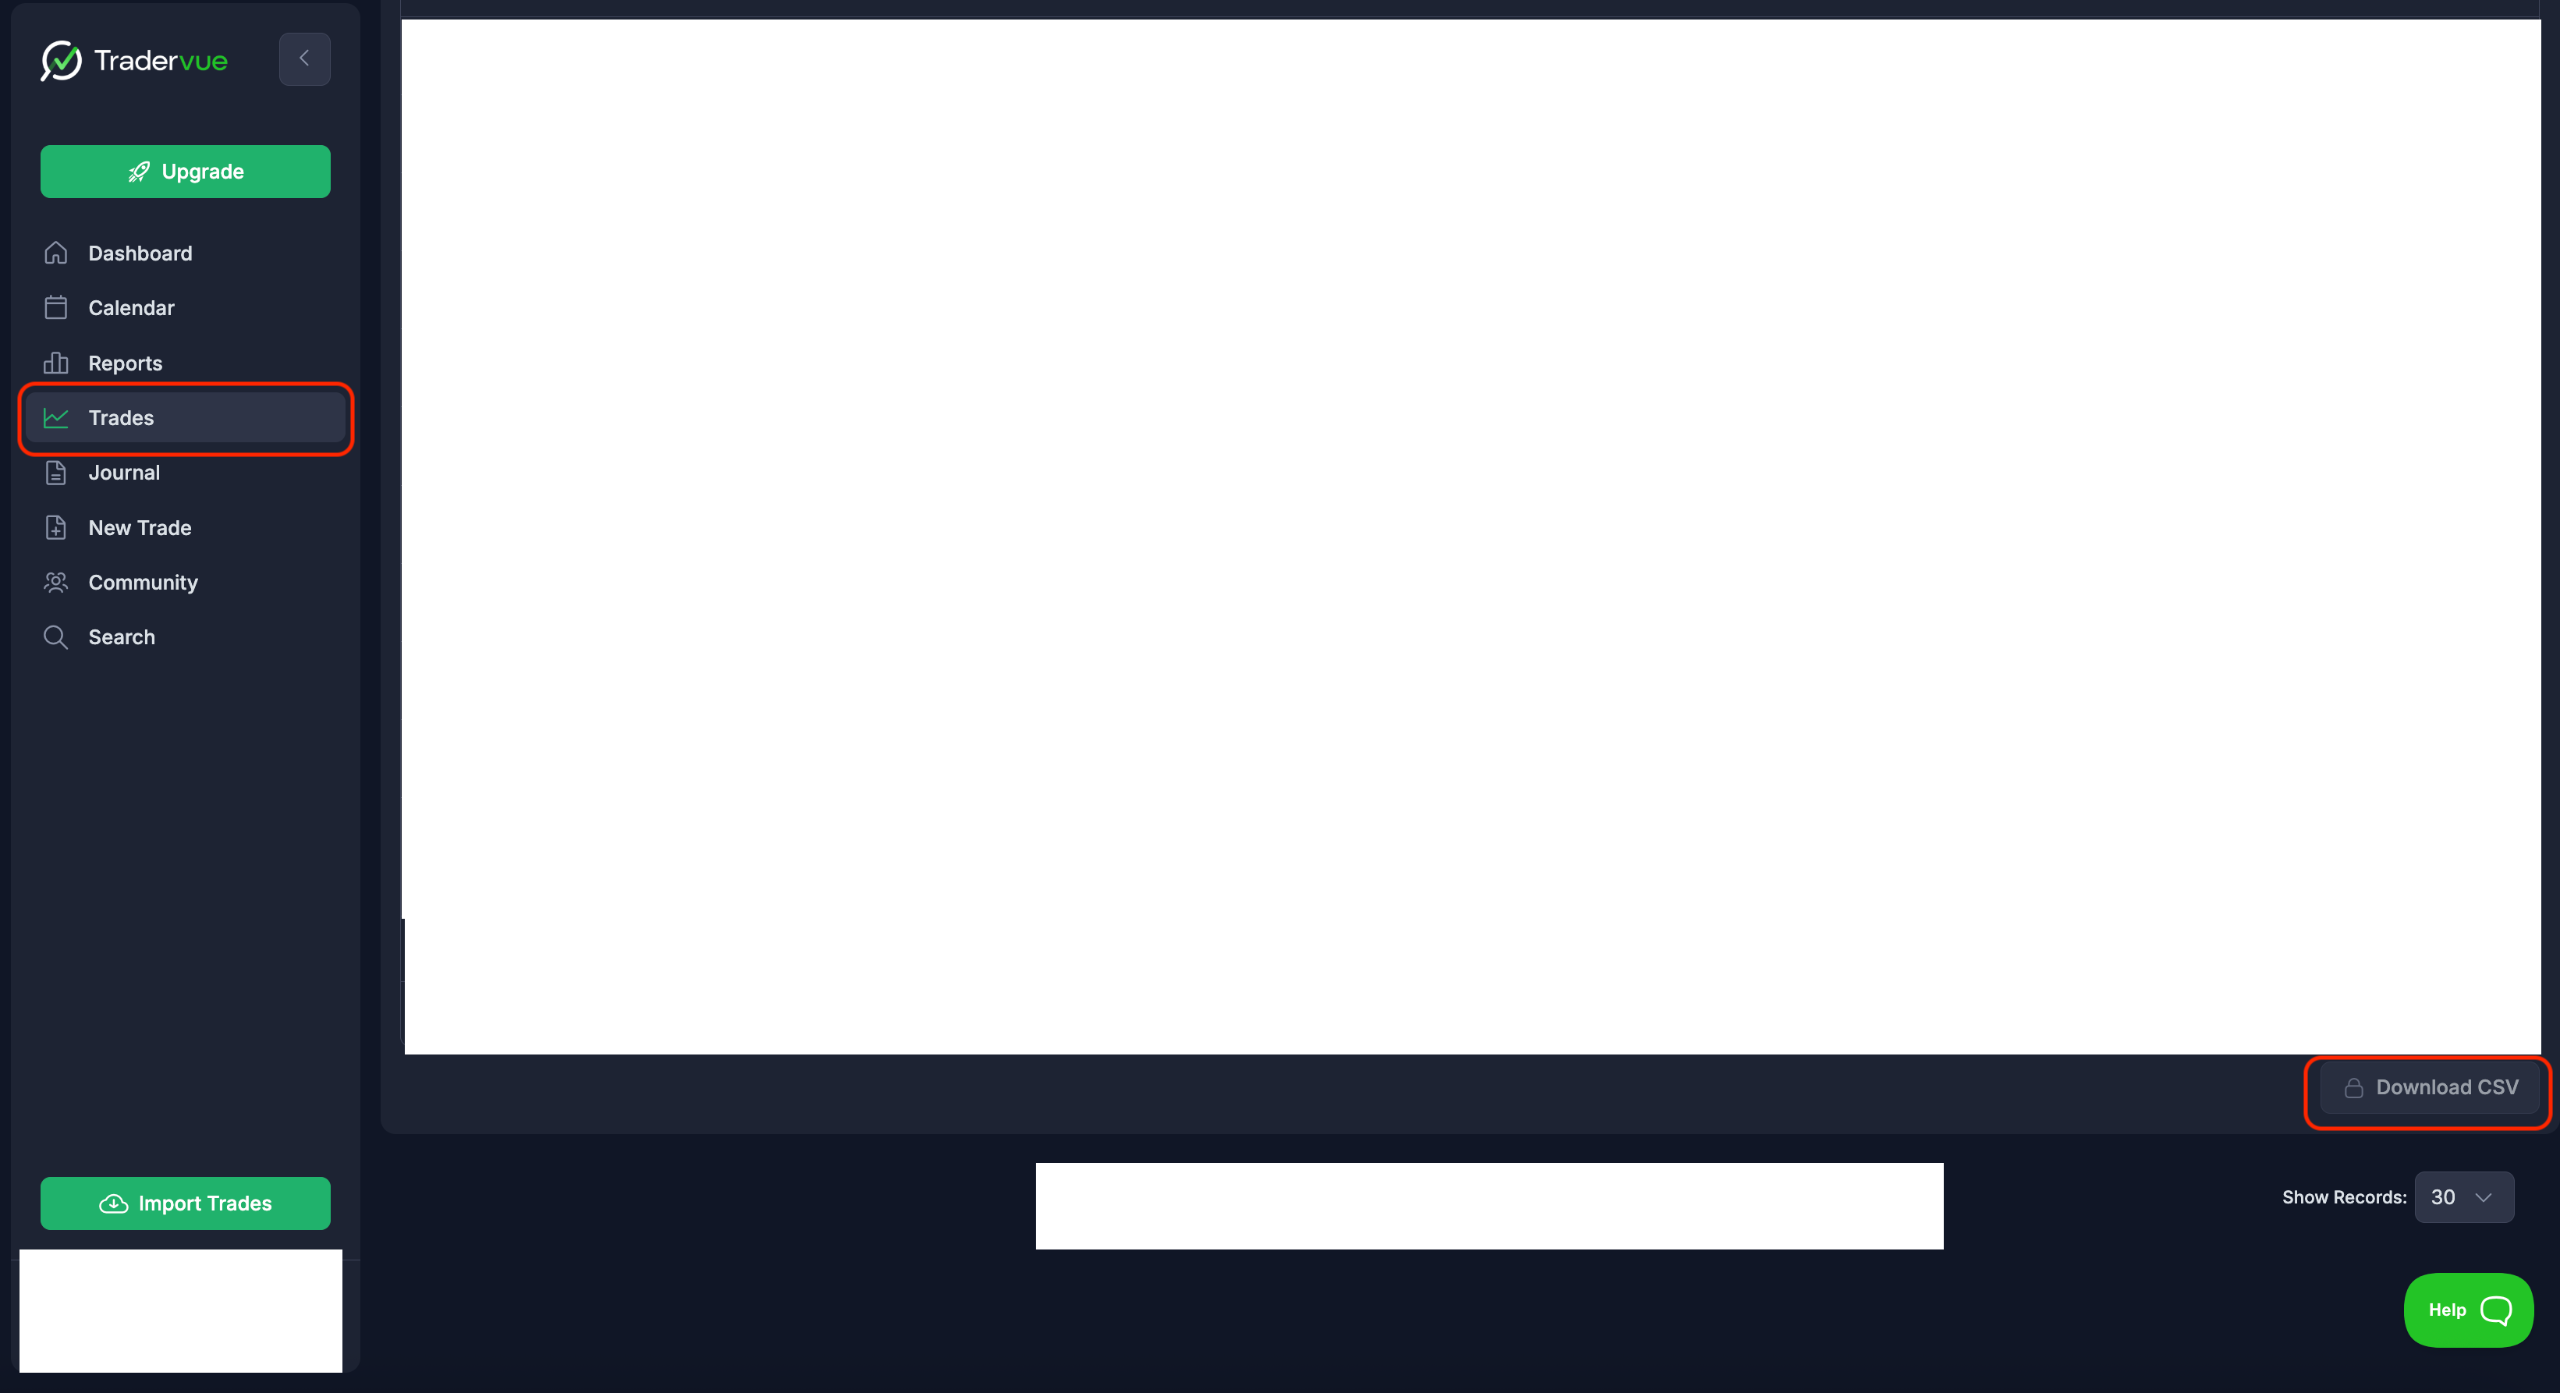
- Go to Trades and scroll down all the way to load your full history.
- Download the CSV — make sure no filters are applied so it includes all of your trades.
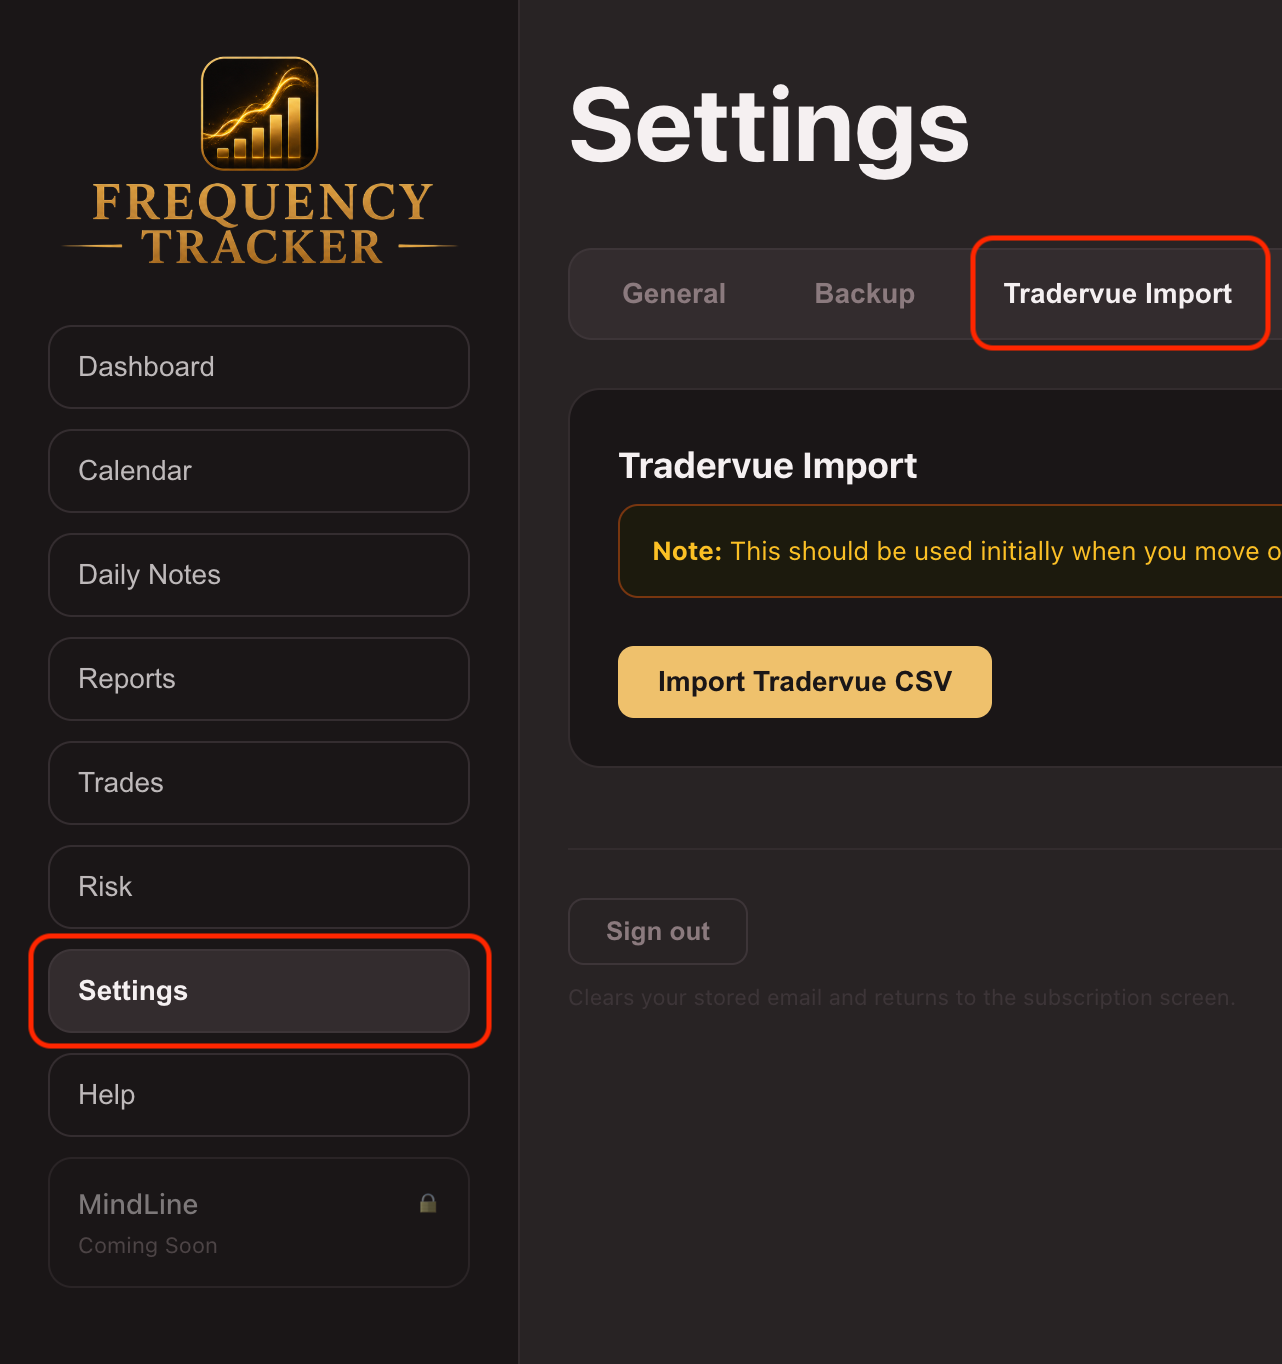
- In Frequency Tracker, go to Settings → Tradervue Import.
- Select the CSV you just downloaded and import.
Where to go next